PayByLink
PayByLink
Administrative dashboard application for link management.
Settings
| Merchant have to set manually their own URLs in PayByLink settings, otherwise the payment will be declined. |
| URL | Description |
|---|---|
URL of online shop where the consumer is forwarded when the payment process has been completed. |
|
URL of online shop where the consumer is forwarded when the payment process could not determine a result yet. |
|
URL of the page where consumer is forwarded when the payment process has been canceled. |
|
URL of online shop where consumer is forwarded when the payment process has failed for some reason. |
|
URL of a web page in online shop which informs consumer about the different possibilities to get in contact with the merchant. |
| If a merchant does not have own links, hobex Service IT’s predefined links from table below can be used. |
|
https://sit.hobex.at/success/ |
|
https://sit.hobex.at/pending/ |
|
https://sit.hobex.at/failure/ |
|
https://sit.hobex.at/cancel/ |
serviceUrl contains the imprint of the merchant web page so that’s why hobex Service IT can’t provide that URL.
|
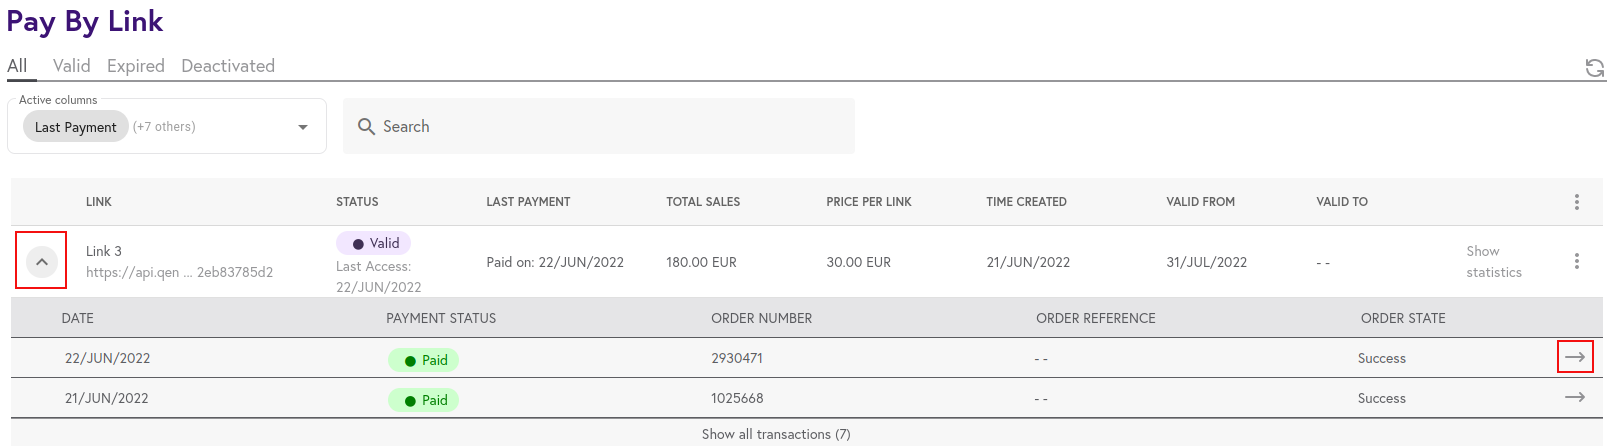
PayByLink Screen
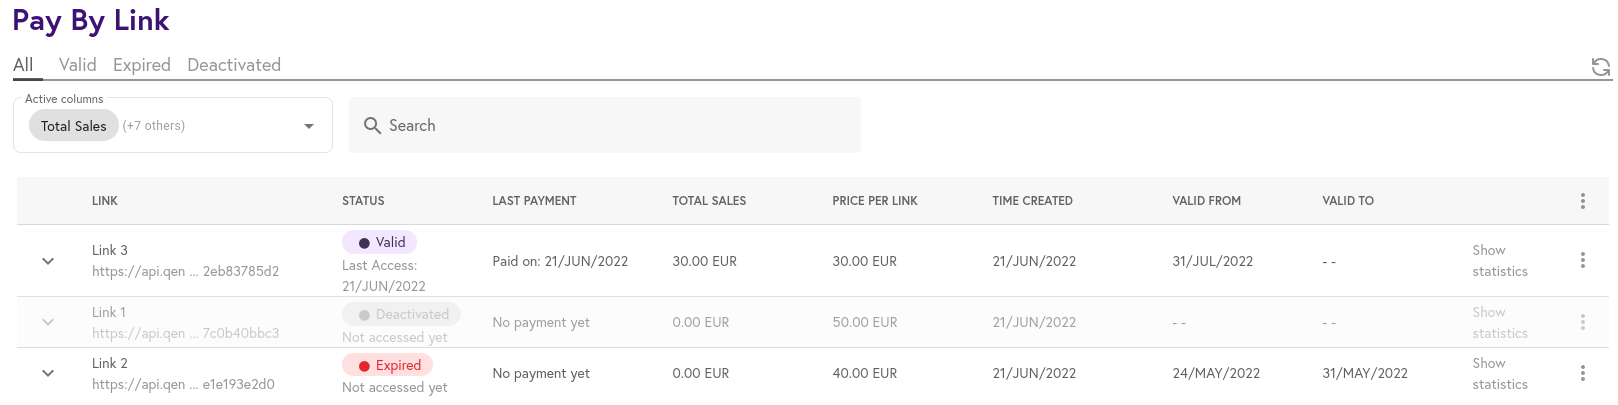
At the top of paybylink table choose which links will be shown by status:
Status can be:
-
Valid
-
Expired
-
Deactivated
Multiple Selections
Adjust the table by marking active columns. Possibilities that can be selected:
| Columns | Description |
|---|---|
Link |
Name of the link. |
Status |
Status of the link: |
Last Payment |
Date of the last payment that is made. Either date is shown, or "no payment yet". |
Total Sales |
Displays the sum of all payments with a link. |
Price per link |
Displays how much is the price per link. |
Time created |
Date when link is created. |
Valid From |
Date when the link is valid from. |
Valid To |
Date until the link is valid. |
The form of the date is DD/MONTH/YYYY.
On the right side, there is a search form for researching a table by the title of the links or their status.
Additional Settings
If the merchant does not want the link to be used anymore but wants to have information about the link in the table, then disable should be used.
| If the link is deleted there is no possibility of being returned and will not be visible in the table. |
Creation of a new Payment Link
For creating a new link fulfill the required Basic Link Settings.
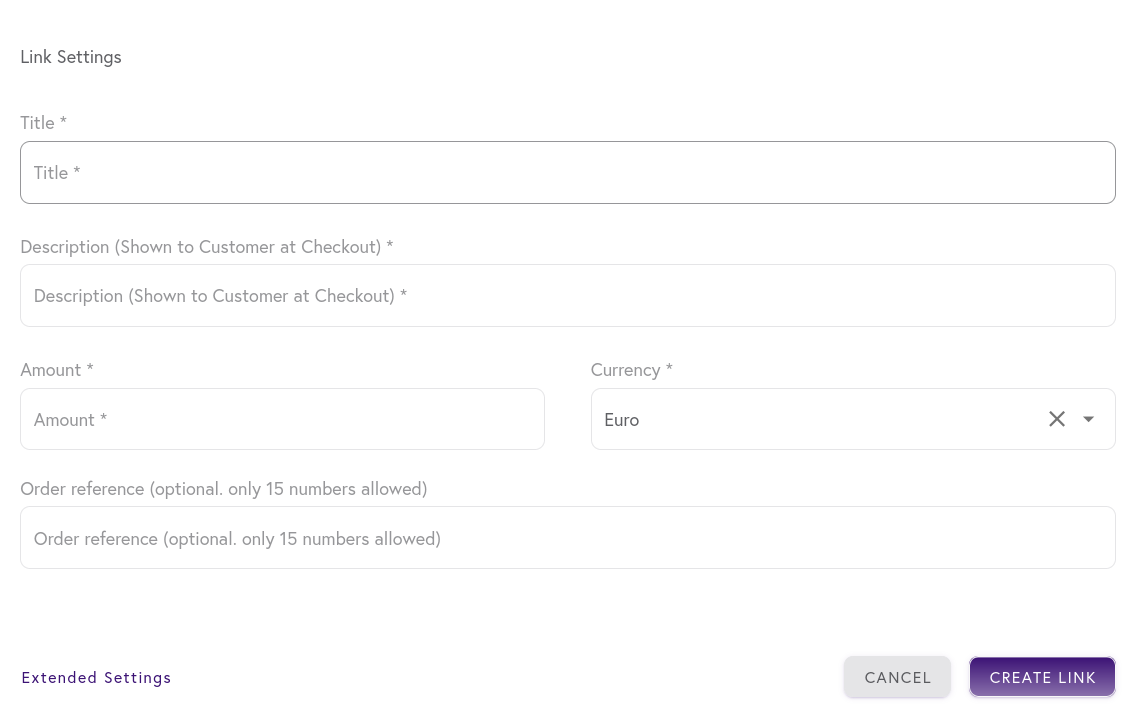
| Parameter | Optional or required | Description |
|---|---|---|
Title |
Required |
Title of the link that will be shown in the table. |
Description |
Required |
The description will be shown to the Customer at Checkout. |
Amount |
Required |
The total amount of the payment. |
Currency |
Required |
Currency for the amount. |
Order reference |
Optional |
Only 15 numbers allowed. |
| The amount from basic settings will be used except if the merchant adds products in the product settings, then the amount will be adjusted automatically after calculation. |
Extended Link Settings
| Extended settings are optional and the link can be created without them. |
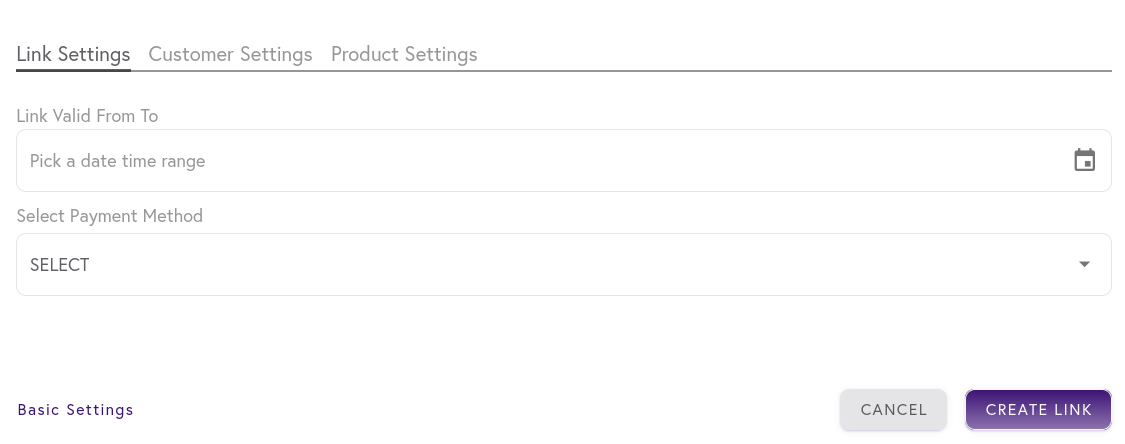
| Parameter | Description |
|---|---|
Link Valid From To |
Duration of the link validity. |
Select Payment Method |
Payment method for the link. The recommendation is to always choose |
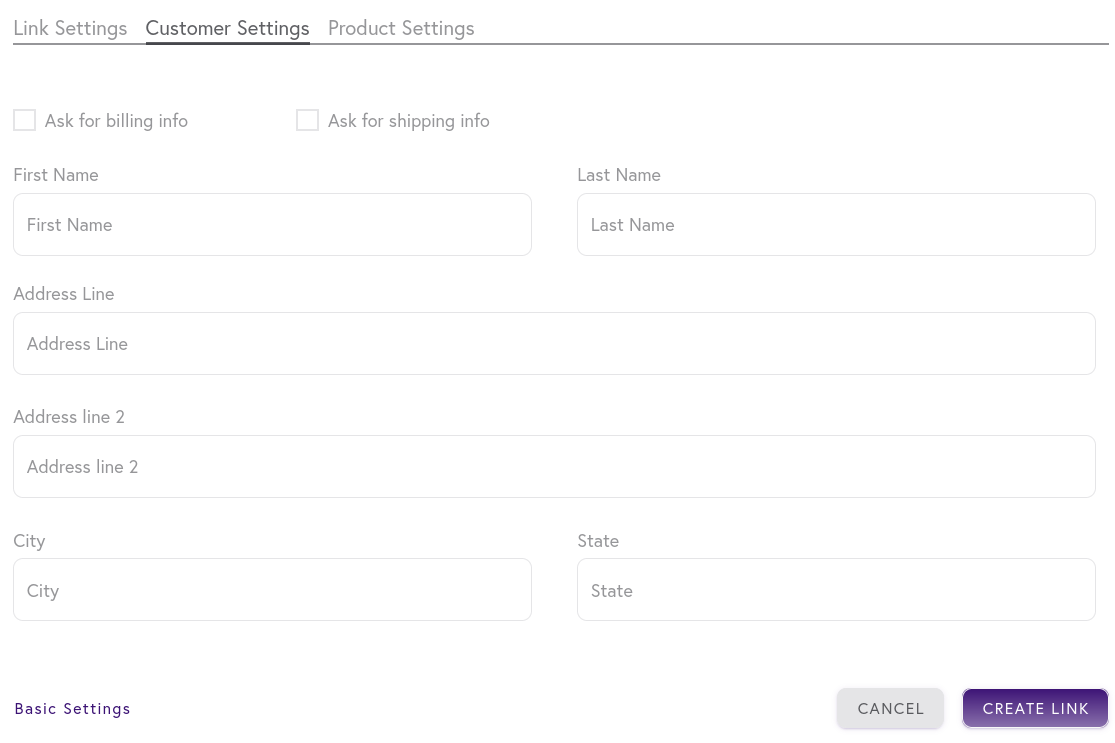
If "ask for billing info" and "ask for shipping info" are both unchecked, the customer has to fill in billing and shipping information in the form, and if they are both checked the customer will have to fulfill the information at the checkout.
Product Settings
The products can be added to the basket and they will be part of the link.
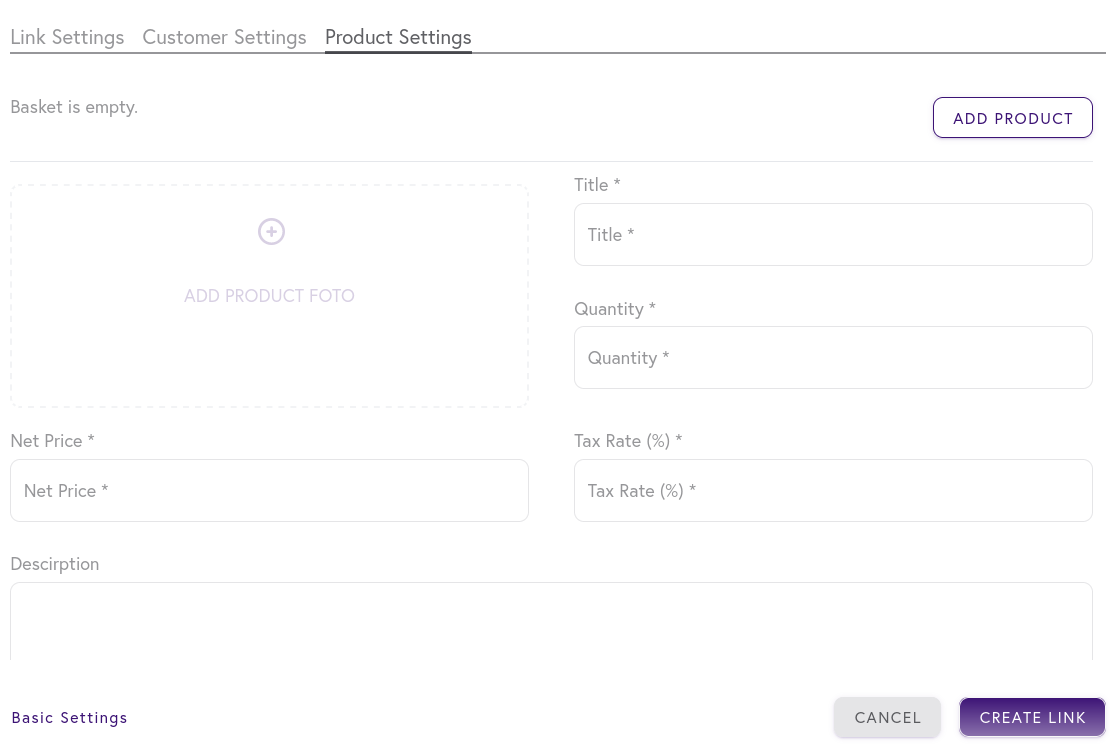
If the customer wants to add products the form is required except for the product photo and description.
| Parameter | Description |
|---|---|
Title |
Title of the product. |
Quantity |
Quantity of the one product that will be sold by each payment. |
Net Price |
Price of one product. |
Tax Rate(%) |
The percentage at which a product is taxed. |
| After fulfilling the form click on "Add Product" to add the product to the Basket. |