Shopware: Installation Guide For Checkout Page
Shopware: Installation Guide For Checkout Page
Before installing the shop plugin install the Cron plugin, which is delivered together with the shop as standard, for shops in version 4.3.x.
The installation guide shows the step-by-step installation of the plugin to the installed shop system on a web server. Test the online shop and the plugin’s configuration on a test system before installing the plugin on a production system.
| Don’t install the plugin from two sources at the same time. |
Step 1
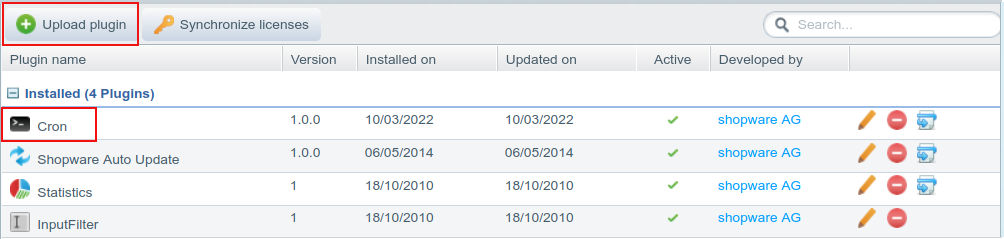
Log in to the administration section of the online shop. Select Configuration > Plugin Manager.
Upload the zip file provided by hobex Service IT. After uploading, the online shop will inform that the plugin has been successfully uploaded. The plugin is now displayed in the list of inactive Plugins.

| To receive a notification when a new version is published, subscribe here and select Releases only. |
Step 2
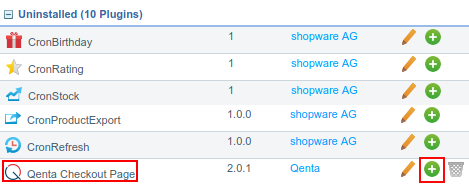
Click on the green (+) icon to install the plugin to the online shop.
In order to guarantee the proper operation of the plugin, it’s necessary to clear the Shopware cache and recompile the Shopware theme. Therefore confirm the following two dialog windows.
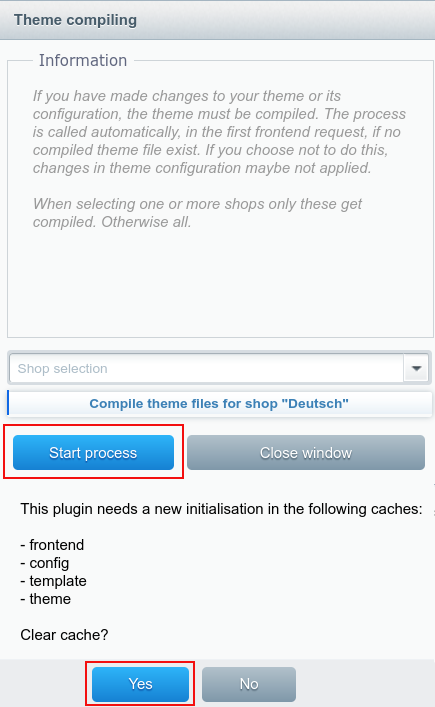
Click "Activate" to activate the plugin and the plugin will be displayed in the list of active Plugins.
Configuring The Plugin
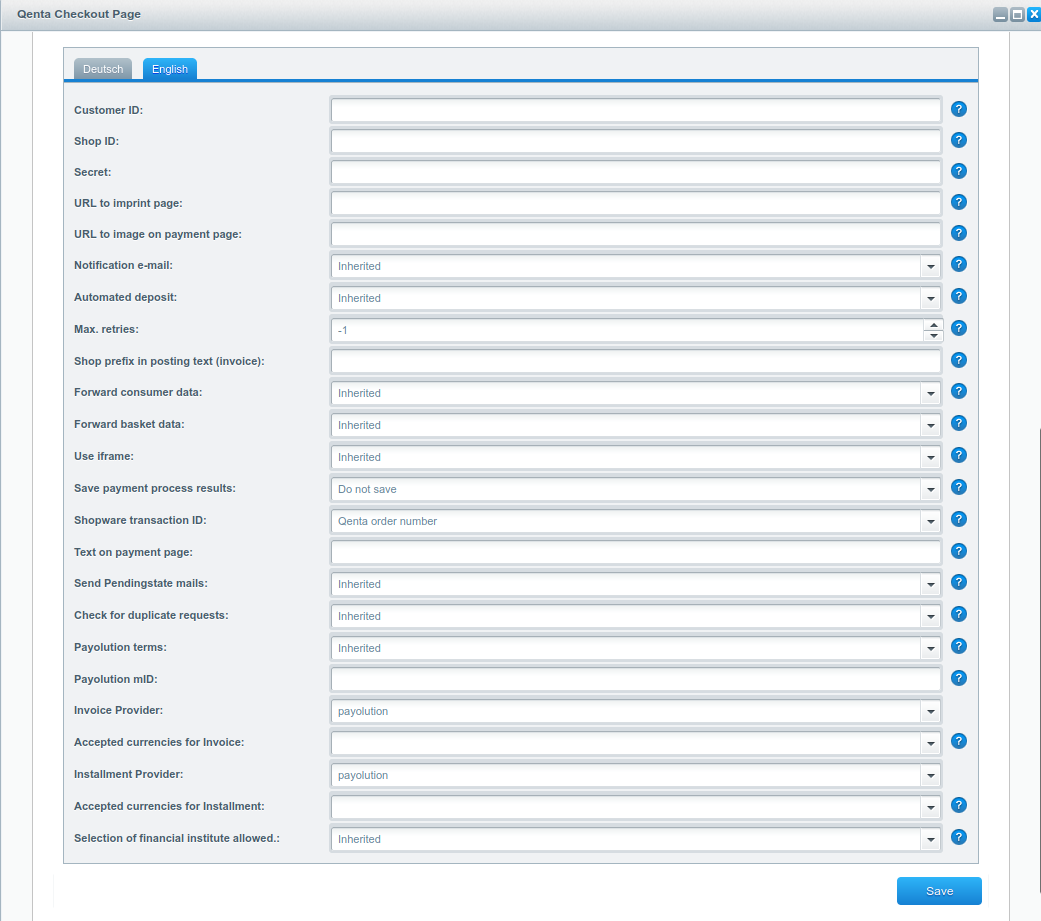
| Customer ID | customerId received from hobex Service IT. |
|---|---|
Shop ID |
Unique identifier for the shop. Has to be enabled by hobex Service IT for this |
Secret |
The secret that is also received from hobex Service IT. |
Service Url |
URL which leads to the imprint of the shop, this field is mandatory. |
Restore basket |
If enabled, the original content of the shopping basket is restored if the consumer changed the basket during the payment process. If disabled, the order is not executed and is set to a clarification state. |
Confirmation mail |
E-mail address of the merchant for receiving payment information details regarding the orders placed by the consumers in an online shop. Has to be enabled by hobex Service IT for the |
Use auto-deposit |
Activating or deactivating the automated deposit immediately after a successful payment was made by the consumer. Has to be enabled by hobex Service IT for |
Max. retries |
A maximum number of retry attempts during payment. |
Send additional data |
Sending additional data regarding consumer data ( |
Use iframe |
If enabled, Checkout Page is displayed within an iframe in an online shop. If disabled, Checkout Page is displayed in the current web browser window during the payment process. After the consumer finished the payment process a redirection to the online shop is performed automatically. Be aware that XHTML strict mode does not support iframes. |
Save hobex Service IT response |
The response of hobex Service IT contains detailed information regarding the transaction. May store these data in an internal field that is not visible to the consumer. |
Logging |
Enable logging for debugging . The log data are written to log files within the ”/ |
Delete log-file after x days |
Count of days until log files are deleted. |
Shopware transaction ID |
The |
Display text |
Optional text is displayed together with the data of the order. |
Activating Payment Methods
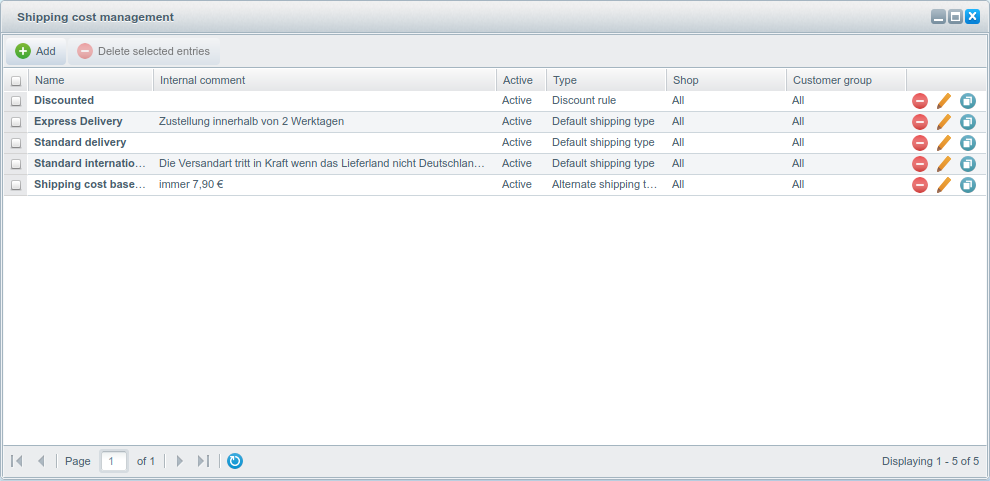
Select Configuration > Shipping and in the window Shipping costs management one type of shipping for editing. A new window named Shipping costs opens. Select the Payments tab. Move required payment methods from the left list named Available to the right list named Selected by selecting the payment method and pressing the → button. Click the Save button and close this dialog.
On the main menu select Configuration > Payment methods to activate the new payment methods. Select one payment method in the left list named Available payments and on the General tab check the Active checkbox.
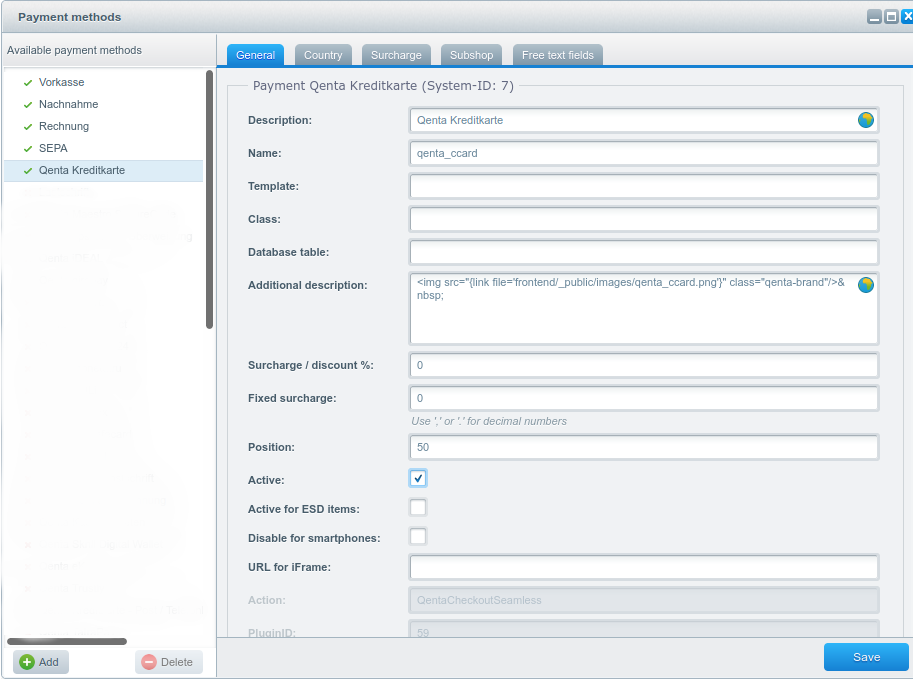
Optionally, it’s possible to modify the description of the payment method and this text is visible to the consumer during the payment process. Additionally, surcharges and discounts can be set per payment method. Within the Position field the sort order of the payment methods presented during the payment process in an online shop can change. After configuring the selected payment method, click the Save button and proceed with the next payment method.
Maestro SecureCode |
Select Configuration > Shipping costs.
Select one type of shipping in the window Shipping costs management for editing. A new window named Shipping costs opens.
Technical Details
For implementation details of this plugin consult the inline documentation of the provided source code.
The source of the plugin is structured into the following folders and files:
-
The
Bootstrap.phpfile is the starting file containing all configurations, hooks and events. -
/Componentscontains the hobex Service IT Library and the Zend framework. The files are automatically included viaLoader.php. -
/Controllermanages the control flow between the hobex Service IT Library, the models and the views. Each method ending with the suffix Action within the Paymenthobex Service ITCEE.php file can be directly called by a proper URL (e.g.https://www.yourserver.com/Paymenthobex Service ITCEE/saveOrder). Especially the confirmation of a successful payment can be done within the URLhttps://www.yourserver.com/Paymenthobex Service ITCEE/confirm. Be aware that this URL has to be reachable over the Internet either on port 80 for http or port 443 for https. -
/Modelsmanages the data, processing, resources, logs and the basket. Especially the methodConfig::getPaymentMethods()is used for configuring the different payment methods. -
/Viewcontains templates, HTML, JavaScript and style sheets for the plugin.
Text resources can be customized and translated. Example files are available within the zip file at hobex Service ITCheckoutPage/assets/lang/<language>.php.
|
Retrieve information on the payment method used by the consumer
Information about the payment method that customer used can be retrieved for a transaction after the plugin has been deleted/uninstalled. After deleting or uninstalling the plugin, the payment method used for a transaction is not displayed anymore in the field Payment method and only an ID is shown instead (go to the administration section of the online shop, select Customers > Orders > Show details > Details).
To be able to still retrieve information on the used payment method, on the Configuration tab select Plugin Manager. Click Installed, select Checkout Page, click Open and select Internal commentfield as value for Save hobex Service IT response.
The payment method used by the consumer is then displayed in the Customers tab. Select Orders > Show details > Communication to see the payment method.